Categories
Colors

The Nikon D4

The Nikon D4 Straddles the Stills/Video Divide

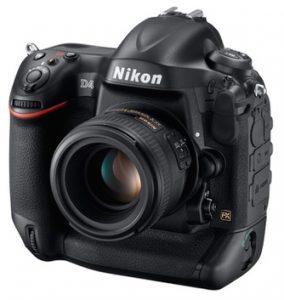
The D4 is an Ideal Camera for the Professional Photographer and Videographer

The Canon 5D markII set the standard for the professional photo/video camera. It is no surprise that Nikon’s response has upped the ante in both departments. However, instead of revolution, Nikon have chosen to improve incrimentally in many areas – the main changes in the stills department have been aimed at making the camera quicker and easier to use. A 16 mega-pixel file size is modest at this level, though 10 Frames per Second is useful, particularly with Autofocus.

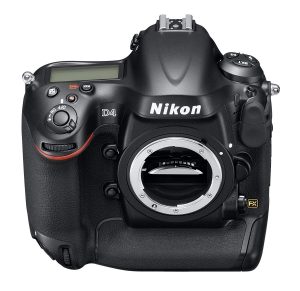
The improved sensor on the Nikon D4 gives the better metering and Subject Tracking and extends face detection for the optical viewfinder. Extending the ISO range from 50 -204,800 is impressive, but surely would only appeal to specific niche – perhaps ill-lit night time sports or nature photography. The Kevlar/carbon fiber-composite shutter unit boasts a standard life cycle rating of 400,000 releases. There are some ergonomic improvements, making the camera easier to handle and the buttons easier to manage. The Nikon Wi-Fi transmitter allows you to see the Live View on an iPad, which can also control shooting mode and trigger the shutter, which might also be useful for the nature photographer.

The Nikon D4 is aimed at professional photographers and videographers who want the combination of top quality video and extensive lens flexibility. It will also appeal to specialist amateurs who shoot in very low-light and want to shoot remotely.

Of course, the main big change is in the video department. Nikon have seriously upgraded their video output to full HD (1080p), full native HD (1920 x 1080p) and even allows you to feed full, uncompressed video into external viewing devices. In other words, it offers full broadcast quality video and stereo sound. An Out Mic lets you set the sound levels before shooting.

Categories
Look

Nikon D3400 white balance


Nikon D3400 white balance settings

Nikon D3400 white balance is one of my favorite settings for a couple of reasons. The first is that it helps you set the camera so that you get naturally exposed pictures which is really good. And the second is that you can use that same process to be really creative with your photography. This article discusses what white balance is and what the camera is trying to do and how creative that can be and how it can help you to manage your environment.

So first of all Nikon D3400 white balance: what is it all about? Well, when you walk into a room, or even outside, the quality of the light and the tone of the light will change. It changes depending on whether you are in natural or artificial light. Your eyes and your brain filter all of that out, so usually you do not really even recognize it, but the camera will because it is quite objective, whereas your eyes and your brain are quite subjective. Usually you do not want to take pictures in a light which has a color cast. If you do not notice the ambient color, then after the shoot, you could discover that your pictures either have quite a yellow or orange tinge, or have quite a blue tinge. The Nikon D3400 white balance – and setting the white balance – allows you to set the camera so that, effectively, it sees what you want to see and it sets white. The important thing to remember about white is it is not a single color, it is a combination of all colors and so once you set white with the camera, the camera is able to set all the other colors accordingly.

There are two ways of looking at the Nikon D3400 white balance. The most obvious one is when you are looking at the back of the camera as you press the i button and Nikon D3400 white balance is third along the top line. That gives you the option to select the white balance that you want. However it does not let you change the white balance within those settings. If you want to do that you need to go into the MENU OPTION and then go into SHOOTING MENU, then you go down to white balance and you will see that you have all the options that you would see when you look in the i button, but, should you press your multi-selector to the right, it will give you the option of either deciding to have a different option within that main sub-option (so for fluorescence, for example, you have seven further options in fluorescent which are all slightly different) or if you do not have different options then you have an option which allows you to change that option within the camera. You can do that by using the multi-selector and you can make either more green or more magenta or blue or more red. Personally, I think this is probably far too detailed unless you are going for a very specific look, but the general way of changing, which is to go back and just look at the general options in white balance when you are in the shooting menu, should be sufficient for you to decide your best option. But if you want to go in and change cloudy for example and make it a little more red or a little more blue then you can do so but you can not make those changes to that option from the i button.

So lets have a look at what the Nikon D3400 white balance options are when we come out of menu and we will have a look through them with the i button. The first one is AUTO. This tries to select the most obvious white balance itself. It has quite a good auto detection for white balance and in most cases you will be fine on AUTO with the Nikon D3400. It is fairly broad brush but it is pretty good for most circumstances. The next one is INCANDESCENT or tungsten. As I mentioned, that has quite a yellow tone to it because it is more like candle light or home and residential lighting which tends to be tungsten lighting and so it will try to take some of that warmth out – some of that orange and yellow and add some of the blue to make whatever is white in that picture more white and less yellow. The next one beyond that is FLORESCENT. That is a little bluer and it is the sort of lighting that you get in offices – the sort of strip lighting that goes across the top – which gives a very blue tone to things. And as a consequence of that the camera will try to add a little yellow to the picture. Then we get on to DIRECT SUNLIGHT. Now direct sunlight is actually a lot bluer than you might imagine and so it does try to add a little more yellow to that just to give it a more natural look. The one after that is FLASH. When you fire the flash, whether it is the built-in flash or an external flash, that is a very cold white shade. So as a consequence of that it does try to add some more yellow to give a more natural tone to the color, and especially, obviously for skin tones which is quite important. Then the next two which are CLOUDY and SHADE move further up Kelvin scale from and obviously then the environment becomes more and more blue as you move up there and so it will be trying harder and harder to add a little yellow and a little orange just to warm that picture up and make it look less cold. Obviously if you are shooting in shade or in cloud then as I said before there is a natural inclination for you for it to look slightly blue, slightly cold, so you want a little orange to warm that picture up.

At the moment, we are looking at setting the camera to get the most natural exposure, but imagine that you are shooting in a fluorescent office, but want the picture to look like it is a room with natural sunlight. This would be a good opportunity to change the Nikon D3400 white balance to shade and the camera will automatically warm the image up for you, changing the whole feel of the picture. That is how the white balance can work for you to create more interesting pictures.

For more information about the Nikon D3400 click here 

Categories
Look

Best Nikon D3400 settings

Nikon D3400 settings are pretty straightforward. The first thing you need to do is to charge your battery. When you buy the camera you will receive a battery and a battery charger and, although the battery may look like it is fully charged, it is worth just giving it an extra hour or so in the charger to make sure. Once you have charged it, put it into the camera Then attach the lens. The lens and camera both have a white dot. Match the dots and gently fit it into the bayonet socket and then twist the lens anti-clockwise until it clicks.

The next thing you need for your Nikon D3400 is a good memory card. Of course you need a memory card to store the pictures and the videos that you shoot on the camera. We suggest getting a SanDisk card and the reason for that is that SanDisk will guarantee the life of the card. It is important to remember they won’t guarantee what is on the card, but if the card fails SanDisk will replace the card. So the way you put the card into the camera is in the side socket. You open it up by pulling it slightly forward and you put the card in facing to you and just push it in until it clicks. What you will notice is that when you put it in completely, a green light flashes on the back of the camera to say that it is being done properly. On the other side are two other ports these are very useful because they are a USB port, which allows you to transfer your pictures directly from the camera to the laptop, and beneath that an HDMI port which allows you to show your pictures on a TV. Neither of these leads are available in the box so if you want to do either of those things you need to buy the leads separately.

d3400 sample ad

Once you have inserted your memory card, the next thing to do is to switch your Nikon D3400 on. But first what I would suggest you do is you take off the lens cap and activate the lens. Press the button on the side of the lens and extend it out. Once you have done that you can switch on the camera and then you will see, in the back screen, that you have got various choices to make in your D3400 settings. You choose your language – you do that by moving the Cross Keys left to right and up and down and then selecting the language by pressing OK. You choose your date in a similar fashion and you also then choose your time zone in exactly the same way, using the cross keys on the back.

All of these things can be changed later anyway so do not worry too much if you get them wrong, or in fact if you do not want to worry too much about them now and bypass those options and to return to them afterwards. But the next thing to do in your D3400 settings is to format your card. If it is a new card, or an old card for that matter, you need to ensure that it is formatted correctly for this camera. Press the Menu button and then go to the Setup Menu. That is the spanner icon. The second one down in that section is FORMAT MEMORY CARD. There is always an element of danger when you format memory cards, particularly once you have started using the camera. If you format the memory card you delete everything on it – even pictures that you think you have protected will be deleted so you need to be very careful when you format cards. However, when you are doing it for the first time you are perfectly at liberty to go to yes and click OK, and it will format the memory card and attune it to this camera properly.

Now you are in a position to take a picture or shoot a video. You can either do this through the Liveview screen which enables you to see what is through the lens or you can do this through the more conventional DSLR way which is to look through the viewfinder. The viewfinder can be tuned to your eyesight, so if you look through the viewfinder and, although the camera says what you are looking at is sharp, it does not look sharp to you, you can use the Dioptric Adjuster which is on the side here to change the focal length of the viewfinder, which means that you can look through it and it looks sharp when in fact the camera says it looks sharp. That is very useful so take some moments just to focus and refocus on a few different things and just check that the viewfinder, when you are looking through it, looks sharp when the camera says that it is sharp.

One of the things that I change straight away in my Nikon D3400 settings is the Auto Timer because cameras have timers on them now in order to help save the battery life and that means that sometimes they switch themselves off and it can be really annoying. But you can set your own Auto Timer lengths by going into the camera and into the Menu Settings so if you go into menu and you go into the Setup Menu then, by going down onto the next page – there are quite a lot of settings here, you will see AUTO OFF TIMERS as an option. If you select that then you can either select Short, Normal or Long or you can go down to Custom and you can select those lengths of time that you prefer and that is what I do. I go down to Custom and check the ones that I want which are PLAYBACK and MENUS IMAGE REVIEW which is the length of time the images are on the back screen for you just to look at after you’ve taken it. LIVEVIEW which is the Liveview screen, and the STANDBY TIMER which is how long the camera sits on standby before it switches itself off.

You can shoot pictures with your Nikon D3400 now, but the best thing to do is to select your image quality and your compression quality before you do. So the first thing to do is to go back into menus and in this instance we are looking at the Shooting Menu. If you go to there in your D3400 settings, the first thing you come across is IMAGE QUALITY. Now image quality talks about compression rates not about the file size, but the compression rate is important. You can shoot RAW images with this camera but I would recommend, initially at least, shooting JPEG and the option I would choose would be JPEG fine because that is the best quality compression rate for JPEGs for this camera. Once you have done that you move one down to IMAGE SIZE and again there is no point shooting medium or small images with this camera. I would say the best thing to do is to shoot large images. Bear in mind that the memory card is probably big enough, with a 16 or 32 gigabyte memory, to shoot hundreds of pictures so you are not limited by memory space as we once were so there is no reason not to shoot large and not to shoot fine JPEG images. As we are in the Shooting Menu in D3400 settings, why don’t we go down one more from IMAGE SIZE to ISO SENSITIVITY SETTINGS. When you switch the camera on for the first time then the D3400 settings are set so that the Auto ISO Sensitivity Control is on and that the camera will choose the ISO setting and if you look below the Auto ISO Sensitivity Control, it will set the maximum sensitivity according to what is chosen there. When you switch it on for the first time the maximum is 25,600. I would say that when you are taking normal pictures you probably do not want to go above 1600 ISO – possibly 3200. By leaving it as it is you allow the camera to choose far higher ISOs than you otherwise might wish, so if you go into this setting, I would suggest that you make the maximum setting as I say 6400 and I would also switch the ISO Sensitivity Control off because that then means that you have more control over the ISO in the basic D3400 settings and also in the manual settings.

After setting the ISO I would stay in the Shooting Menu  in the D3400 settings and move one down again to WHITE BALANCE. Now it is important initially that white balance is on AUTO. What white balance does is it sets the white in the picture or video. Now, if you know anything about colors, you know that white is a combination of all colors and so once the camera can set white it can also set the values for all the other colors. So it is very important and it is also very important if you are shooting somewhere where the balance of light is not normal – for example if you are shooting in an office where the light may be slightly blue or if you are shooting at home under artificial light where the color of the light might be slightly yellow. You are not going to see this with your naked eye because your brain manages to filter those tones and those colors out, but the camera will see it and it is important that the camera initially is on AUTO so that it can set the white balance itself and try to balance all of the different color components that it sees through the lens.

The last thing I want to mention is very useful once you have taken your pictures. If you go into Playback Menu once you have taken a picture and go down to PLAYBACK DISPLAY OPTION then you will see that you have options that give you information on the picture once you’ve taken it. So you have got the options in your D3400 settings of showing the HIGHLIGHTS the RGB HISTOGRAM SHOOTING DATA and OVERVIEW. These are really useful bits of information and they are useful for you to recall and go back to once you have taken the picture and you just want to see what settings you had, or actually during the live shoot when you can see with the RGB histogram or the tonal histogram where your picture may be failing or just not working to its optimum. So they are very useful things to have, and by allocating and switching those on when you go into playback mode and you look at your pictures by pressing the cross keys up or down you will be given these pieces of information with the picture also viewable on the view screen. It is a really useful way of just keeping control and keep an eye on the various options and settings that you have when you take a picture. So, for example, it will give you the histograms but also the ISO. It will give you the focal length, it will give you all the various autos in terms of white balance or whether the flash was on etc. In the old days when you were shooting with film you would have taken a notebook and written all of this down but because it is available on the back screen it makes it a whole lot easier. As you can see, getting your D3400 settings right is not difficult and means that you will get the best out of your Nikon D3400 straightaway.

Click on this link to find out more about the Nikon D3400 settings

Categories
Look

Nikon Coolpix L26 – camerawize

The Nikon Coolpix L26 is an excellent camera for beginners. It is a described as a no frills camera- and is one of the cheapest around, but has a surprising array of features and still retains the quality you would expect from Nikon. The 5x lens is the usual high Nikon standard and it produces a 16 mega-pixel file. It has an easy to use auto mode  (with 18 simple options) and has a larger than average LCD screen. Portraits are easy with the Smart Portrait System, which has blink warning and skin toning.

It slips into video recording at the touch of a button and can shoot remarkably crisp 720p video. 

The L26 takes AA batteries and is available in silver, red and black.

The Coolpix L26 is ideal for someone who just wants a basic point and shoot, a youngster showing an interest in photography, or to take to places you wouldn’t want to take an expensive camera. Although it seems basic, it is capable of taking some great shots.

Nikon Coolpix L26 Features

16 MP File Size:This is really impressive. You can blow pics up to poster size

Easy Auto mode: This optimizes all the settings to ensure good photos

 5x optical zoom lens (26–130mm): Not the biggest range, but a great quality lens

720p video recording: One touch recording and really good quality video

e-VR (vibration reduction): Similar to the system on other nikon compacts

7.5 cm (3.0-in.) LCD screen: Larger than other cameras in this bracket

 ISO up to 1600 and Motion detection: All these contribute to your picture quality

Best shot selector: Selects your sharpest shot for you

18 scene modes: All the popular styles catered for here 

Wireless transfer: Transmit your pictures directly to your phone or computer