Categories
Colors

The Nikon D4

The Nikon D4 Straddles the Stills/Video Divide

The D4 is an Ideal Camera for the Professional Photographer and Videographer

The Canon 5D markII set the standard for the professional photo/video camera. It is no surprise that Nikon’s response has upped the ante in both departments. However, instead of revolution, Nikon have chosen to improve incrimentally in many areas – the main changes in the stills department have been aimed at making the camera quicker and easier to use. A 16 mega-pixel file size is modest at this level, though 10 Frames per Second is useful, particularly with Autofocus.

The improved sensor on the Nikon D4 gives the better metering and Subject Tracking and extends face detection for the optical viewfinder. Extending the ISO range from 50 -204,800 is impressive, but surely would only appeal to specific niche – perhaps ill-lit night time sports or nature photography. The Kevlar/carbon fiber-composite shutter unit boasts a standard life cycle rating of 400,000 releases. There are some ergonomic improvements, making the camera easier to handle and the buttons easier to manage. The Nikon Wi-Fi transmitter allows you to see the Live View on an iPad, which can also control shooting mode and trigger the shutter, which might also be useful for the nature photographer.

The Nikon D4 is aimed at professional photographers and videographers who want the combination of top quality video and extensive lens flexibility. It will also appeal to specialist amateurs who shoot in very low-light and want to shoot remotely.

Of course, the main big change is in the video department. Nikon have seriously upgraded their video output to full HD (1080p), full native HD (1920 x 1080p) and even allows you to feed full, uncompressed video into external viewing devices. In other words, it offers full broadcast quality video and stereo sound. An Out Mic lets you set the sound levels before shooting.

Categories
Look

Nikon D3400 white balance


Nikon D3400 white balance settings

Nikon D3400 white balance is one of my favorite settings for a couple of reasons. The first is that it helps you set the camera so that you get naturally exposed pictures which is really good. And the second is that you can use that same process to be really creative with your photography. This article discusses what white balance is and what the camera is trying to do and how creative that can be and how it can help you to manage your environment.

So first of all Nikon D3400 white balance: what is it all about? Well, when you walk into a room, or even outside, the quality of the light and the tone of the light will change. It changes depending on whether you are in natural or artificial light. Your eyes and your brain filter all of that out, so usually you do not really even recognize it, but the camera will because it is quite objective, whereas your eyes and your brain are quite subjective. Usually you do not want to take pictures in a light which has a color cast. If you do not notice the ambient color, then after the shoot, you could discover that your pictures either have quite a yellow or orange tinge, or have quite a blue tinge. The Nikon D3400 white balance – and setting the white balance – allows you to set the camera so that, effectively, it sees what you want to see and it sets white. The important thing to remember about white is it is not a single color, it is a combination of all colors and so once you set white with the camera, the camera is able to set all the other colors accordingly.

There are two ways of looking at the Nikon D3400 white balance. The most obvious one is when you are looking at the back of the camera as you press the i button and Nikon D3400 white balance is third along the top line. That gives you the option to select the white balance that you want. However it does not let you change the white balance within those settings. If you want to do that you need to go into the MENU OPTION and then go into SHOOTING MENU, then you go down to white balance and you will see that you have all the options that you would see when you look in the i button, but, should you press your multi-selector to the right, it will give you the option of either deciding to have a different option within that main sub-option (so for fluorescence, for example, you have seven further options in fluorescent which are all slightly different) or if you do not have different options then you have an option which allows you to change that option within the camera. You can do that by using the multi-selector and you can make either more green or more magenta or blue or more red. Personally, I think this is probably far too detailed unless you are going for a very specific look, but the general way of changing, which is to go back and just look at the general options in white balance when you are in the shooting menu, should be sufficient for you to decide your best option. But if you want to go in and change cloudy for example and make it a little more red or a little more blue then you can do so but you can not make those changes to that option from the i button.

So lets have a look at what the Nikon D3400 white balance options are when we come out of menu and we will have a look through them with the i button. The first one is AUTO. This tries to select the most obvious white balance itself. It has quite a good auto detection for white balance and in most cases you will be fine on AUTO with the Nikon D3400. It is fairly broad brush but it is pretty good for most circumstances. The next one is INCANDESCENT or tungsten. As I mentioned, that has quite a yellow tone to it because it is more like candle light or home and residential lighting which tends to be tungsten lighting and so it will try to take some of that warmth out – some of that orange and yellow and add some of the blue to make whatever is white in that picture more white and less yellow. The next one beyond that is FLORESCENT. That is a little bluer and it is the sort of lighting that you get in offices – the sort of strip lighting that goes across the top – which gives a very blue tone to things. And as a consequence of that the camera will try to add a little yellow to the picture. Then we get on to DIRECT SUNLIGHT. Now direct sunlight is actually a lot bluer than you might imagine and so it does try to add a little more yellow to that just to give it a more natural look. The one after that is FLASH. When you fire the flash, whether it is the built-in flash or an external flash, that is a very cold white shade. So as a consequence of that it does try to add some more yellow to give a more natural tone to the color, and especially, obviously for skin tones which is quite important. Then the next two which are CLOUDY and SHADE move further up Kelvin scale from and obviously then the environment becomes more and more blue as you move up there and so it will be trying harder and harder to add a little yellow and a little orange just to warm that picture up and make it look less cold. Obviously if you are shooting in shade or in cloud then as I said before there is a natural inclination for you for it to look slightly blue, slightly cold, so you want a little orange to warm that picture up.

At the moment, we are looking at setting the camera to get the most natural exposure, but imagine that you are shooting in a fluorescent office, but want the picture to look like it is a room with natural sunlight. This would be a good opportunity to change the Nikon D3400 white balance to shade and the camera will automatically warm the image up for you, changing the whole feel of the picture. That is how the white balance can work for you to create more interesting pictures.

For more information about the Nikon D3400 click here 

Categories
Colors

Canon 1300D video settings

The Canon 1300D/Rebel T6 DSLR is a great camera for shooting stills and also movies. However, it is always a good idea to get the Canon 1300D video settings right from the start.

The Canon 1300D has a specific option for movies and in order to make any changes in the 1300D to shoot movies you need to go to the Video Mode, which is on the Mode Dial. Turn the Mode Dial round to the very bottom option which shows a video camera, and you will hear the mirror inside the camera pop up. This allows you to see your subjects through the backscreen and this is the only way you can shoot video on this camera.

The menu tab options are different when you are in video mode. You have fewer choices, but they are dedicated to shooting video. The first thing that you should decide on is your video system. This may seem a bit irrelevant – it was developed when Television systems were very different and if you wanted to show your videos on a TV screen you had to marry the cameras settings to the TV. There are two systems, one is PAL and the other is NTSC. NTSC operates in the United States and PAL tends to be the system which is operated in Europe and other parts of the world. Whilst there is not much difference, it does change the way that the camera operates very slightly. For example, when you start to look at the frame rates you will see that under NTSC you get a frame rate option of 60 frames per second or 30 frames per second. When you are in PAL you get the option of 50 frames a second and 25 frames per second. Most people these days don’t shoot on DSLR in order to show their videos on televisions. They tend to use it for social media or showing on a laptop. In which case it doesn’t make really any difference. However, also be aware that these frame rate speeds can affect the way a video looks under artificial lighting, or if you have a tv screen or monitor in the shot. That is because lights flicker and TVs work at the same NTSC rates in the USA and PAL rates in Europe. So it is worth getting right, otherwise you might find a strange flickering in your video, or the TV screen will have a black band dropping down the screen, because the camera and lights are out of synchronisation. Annoyingly, you won’t see this until you are editing afterwards. In order to change Video Mode you need to go into the menus and you go to Tab 2 and down at the bottom you have the option to change Video System.

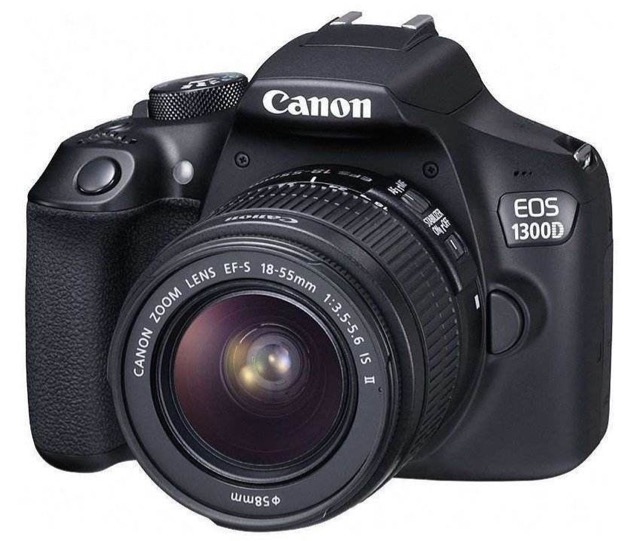
The second options you need to think about in the Canon 1300D video settings is file size and frame rate. Although they are two choices, they are combined for you in the Canon 1300D video settings. These options are important because they will decide the quality of the movies that you produce. The canon 1300D is pretty good – it will shoot 1080p which is full HD and it will also shoot 720p which is standard HD – both these sizes are absolutely fine for YouTube or Vimeo. In order to make those selections go into Video Tab 2 and find Movie Recording Size. Press on that option and we are offered four choices. Depending on whether you’ve chosen NTSC or PAL, you maximum rates will be either 60fps or 50fps.

The next option you need to consider in the Canon 1300D video settings is exposure. When you are shooting photographs with the Canon 1300D you have many options. They are all on the Mode Dial and they go from entirely manual to semi-automatic and then to entirely automatic options. In most of these Modes the Canon 1300D is trying to get the best exposure for the stills that you are shooting, within the parameters of light etc. With shooting movies you have two options – you can either shoot Automatic or you can shoot Manual. With Automatic in the movie setting the Canon 1300D will try to get the best exposure for you and it usually works very well, so I would suggest that initially at least you shoot in Automatic until you become more confident.

When you progress to Manual, changing the various parameters in the Canon 1300D video settings can seem quite complicated. They are certainly different than the option for shooting photographs. Movie Exposure is in Video Tab 1 and you get the two choices, Auto or Manual. If you choose to go into Manual then you have much more control over the settings. You will be able to change the Shutter Speed, the Aperture and the ISO. For the Shutter Speed, rotate Main Dial on the Canon 1300D. By depressing the AV button and rotating that Main Dial at the same time you can change the Aperture. The ISO is changed by pressing the flash button and rotating the Main Dial.

The fourth option you need to consider in the Canon 1300D video settings is sound. Sadly, the Canon 1300D does not have an external microphone socket. It just has an internal microphone which works reasonably well, but can be a bit limited. In Shooting Tab 2, the second one down is Sound Recording and you can set that to one of three options. You can have either Auto, Manual or Disabled. I don’t think you should disable it entirely because sometimes it is useful to have sound, even if you don’t intend to use it in the final cut. It is helpful for editing. Auto is quite good and it will try to pick up as much sound as possible. Of course, you may not want the ambient sound, you might be trying to capture something specific. Manual is OK provided you are quite close to the sound source. On the backscreen you will see a decibel bar going across the bottom and you should try to get the sound peaking at about 12.

The next couple of options in the Canon 1300D video settings that need to be checked are in Video Tab 3 and it may seem that they are less important than other choices. However, you should take a look at them because they do affect the way that your video looks. Go to the bottom of Video Tab 3 to the Picture Style option. These options can really affect the way your movies look. They are the same options that you get with photographs and you can choose to have Vivid or Sepia or many other options and some of them are set so that they bring out the best qualities for portrait and landscape. With video it tends to be better to try and shoot video as flat as possible and so the best option to start with is neutral and so you should always set that to neutral for video until you make the decision that you want to change the Picture Style and shoot something differently. The one just above that in Video Tab 3 is Custom White Balance. It’s very important for shooting videos because if you start moving around and shooting things in different light then the one stable element – the one constant – will be the white balance.

To see more about the Canon 1300D/T6 Click here.
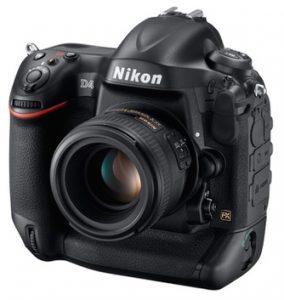
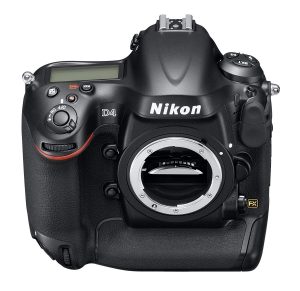
Categories
Look

Lumix TZ20


With the Lumix TZ20, Pansonic have taken their excellent technology and produced a camera that makes sharing your images so much easier with GPS geo-tagging. It is amongst the best in category with its 14 Mega-pixel files and remarkable Leica 16x zoom lens. This is equivalent to 24-380mm and the image zoom within the camera can take magnification to 21x (500mm). The 24mm setting is superb – especially good for ultra-wide angle shots. The lens is covered with a unique anti-glare coating. The autofocus is quick and accurate and the image stabilization means that the pictures are usually sharp, even at full zoom and when hand held.

14 MP files are easily big enough to blow up to poster size and it can shoot a very impressive 10 frames per second in a single burst. ISO extends to 6400, though this is not a camera designed especially for low light photography.

The Lumix TZ20 has a GPS unit with a cache of landmarks already loaded,so you can let the camera geo-tag your shots ready for sharing on social media sites. they camera will automatically store the tagged pictures in alphabetical order for speedy retrieval.

The LCD touch screen is clear and bright. you can use autofocus by just tapping on the subject on screen and you can tap to take the picture as well. The 10 FPS burst can be used to produce 3D images – just press the button and the camera will choose the two best images for the 3D effect.

The TZ20 can record full HD video. The autofocus and and image stabilization works with video and makes a huge difference to the quality, particularly if you are shooting on the move. There is an inbuilt stereo Mic. Many of the scene modes for stills transfer over to video. These include Portrait, Soft Skin, Transform, Self-Portrait, Scenery, Food, Party, Candle Light, Sunset, Beach, Snow, Aerial, Pinhole and Film Grain. It has a HDMI socket so that you can play your video straight onto a TV. It takes SD memory card and SDHC memory cards and has a built in memory of about 18MB.

OUR EXPERT SAYS

What a great travel camera! The TZ20 combines a superb lens, fast burst speed and excellent image quality to produce a great all-rounder. The geo-tagging facility is really clever and the image stabilizer turns a good stills camera into an astonishing video camera. The HDMI socket means you can see your work on your TV as soon as you get home.

Panasonic Lumix TZ20 Features

16x Optical Zoom Lens (21x including digital): Excellent quality lens and the built in image stabilizer is superb.

Full HD video: Good quality and it can plug straight into your TV.

Built-in GPS Function, Geo-tagging and landmark recognition: Means your images are Social Media ready.

Touch-screen LCD : Intuitive and quick. 

3D Photo Shooting Capability: Easy with the 10FPS burst mode.

Find out more about the Lumix TZ20 here.

,cameras, photography

Categories
Look

Nikon Coolpix L26 – camerawize

The Nikon Coolpix L26 is an excellent camera for beginners. It is a described as a no frills camera- and is one of the cheapest around, but has a surprising array of features and still retains the quality you would expect from Nikon. The 5x lens is the usual high Nikon standard and it produces a 16 mega-pixel file. It has an easy to use auto mode  (with 18 simple options) and has a larger than average LCD screen. Portraits are easy with the Smart Portrait System, which has blink warning and skin toning.

It slips into video recording at the touch of a button and can shoot remarkably crisp 720p video. 

The L26 takes AA batteries and is available in silver, red and black.

The Coolpix L26 is ideal for someone who just wants a basic point and shoot, a youngster showing an interest in photography, or to take to places you wouldn’t want to take an expensive camera. Although it seems basic, it is capable of taking some great shots.

Nikon Coolpix L26 Features

16 MP File Size:This is really impressive. You can blow pics up to poster size

Easy Auto mode: This optimizes all the settings to ensure good photos

 5x optical zoom lens (26–130mm): Not the biggest range, but a great quality lens

720p video recording: One touch recording and really good quality video

e-VR (vibration reduction): Similar to the system on other nikon compacts

7.5 cm (3.0-in.) LCD screen: Larger than other cameras in this bracket

 ISO up to 1600 and Motion detection: All these contribute to your picture quality

Best shot selector: Selects your sharpest shot for you

18 scene modes: All the popular styles catered for here 

Wireless transfer: Transmit your pictures directly to your phone or computer