The Nikon D3400 Buttons
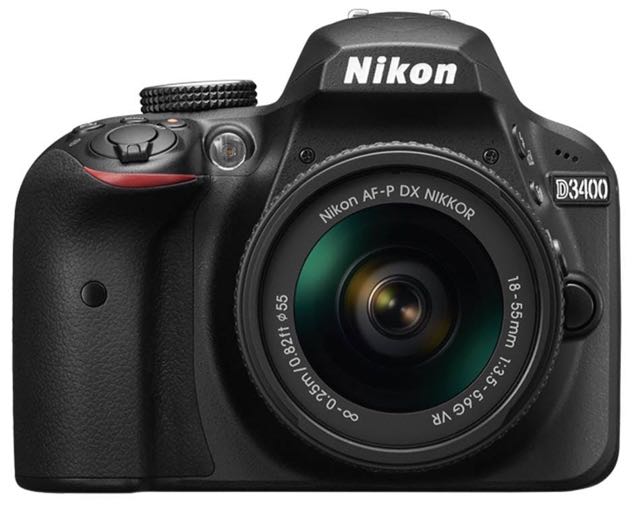
The Nikon D3400 buttons allow you to get into the inner workings of the camera easily. Whilst the Mode Dial is a useful short cut to se the camera to shoot in specific styles, the buttons will give you more control over your pictures and videos.
The Nikon D3400 buttons at the top begin with the ON/OFF switch. You can see that that rotates either clockwise or anti-clockwise. Within that switch is the shutter button and this is what you press to take the picture. The next large thing on the top of the camera is the MODE DIAL. This is really important because it is the thing that you are going to turn to most of all – particularly in the early stages of your photography with this camera but pretty much all the way through. The MODE DIAL will tell the Nikon D3400 what mode you want to use to take the picture, and the mode in this sense means what style of picture or the circumstances in which you are photographing so that the camera itself can change the settings and the parameters to take the picture with the best exposure. Unless you are in M for manual, in all the other modes the camera will decide the best exposure for you and that’s very important to remember.
Next to the delete button is the SHUTTER CONTROL BUTTON. Now it is not the shutter release button, which is on the top and allows you to take the picture, but the shutter control button gives you the options for when you press that shutter button. So, for example, the first option is single frame which means that you press the shutter button once and you take one picture. The next one is continuous which means that if you press the shutter button then you will take five frames per second probably up to four or five seconds before it has to start to buffer which means of course up to 20 or 25 frames. The one after that is the quiet shutter release. Then, after that, you get on to the self timers. The self timer can be very useful because if you want to take a picture of a group and be in that group, then you can set it on to the initial one which is ten seconds and then you can press the shutter button and then run round to the front and be in that picture, which is very useful. The next two are with connection to the remote control the infrared remote control which you can buy as an accessory to this camera and it allows you to set the shutter and to release the shutter by remote control using infrared. It has a two-second delay and it has an instant shutter release. The two-second delay makes sense of course because you do not want to be photographed if you are going to be in the group holding the shutter release infrared light. So it gives you two seconds to put your hand down. The instant one is if you are away from the camera but you have infrared connection to it and it means that you can fire that shutter release straight away.
The buttons on the left hand side of the camera are really very useful and quite powerful. The one at the very top is the PLAYBACK BUTTON and that allows you to see the pictures or the videos that you have taken. So by pressing that button and then using the multi-selector to navigate your way through, you can see either the stills or the videos that you have taken and by looking at the magnifying glasses which are just below the MENU BUTTON either the plus or the minus, if you find a still image that you want to examine more closely then you can use the plus to go into that and look at it more closely or to come out of it again you can use the minus magnifying glass. With the minus magnifying glass you can look at multi images on the back as well so if you press that when it is a full frame then you will get four images and then you will get nine and then you will get even more if you press it on more time, and that gives you an idea of how many pictures you have taken and if you wish, I guess the sort of progress that you are making in terms of the images that you are taking if you’re doing a specific shoot, or you are trying to take a picture of something in particular. The one we missed out there is the MENU BUTTON and that really is important because that allows you access to the menus. Now the one criticism that I would aim at Nikon here is that they have not given us enough menus. we have essentially got four. We have got a PLAYBACK MENU, a SHOOTING MENU, a SETUP MENU and a RETOUCH MENU and then the one below that is just a RECENT SETTINGS MENU. So we have essentially four menus with an enormous number of selections in each of them. That means that it can be quite difficult to find what you are looking for and I would either say this is a criticism I have of this camera. There are other cameras out there which have more menus with fewer subcategories and navigating through them is a lot more simple, but this is what we have got and we shall go through the menus in a different video.
If we go down again to the magnifying glass we also have next to it a question mark and that is also very useful because if we get to a point where we are looking at one of the options in the camera and the question mark pops up at the bottom of the screen, then by pressing this button we get a brief guide as to what it is we have selected. The final button here is the i button and it is very useful because it gives you quick access to the settings that you can change when you want to take a picture. Please remember that if you are in one of the manual modes M, A, S, P, then you have access to – and are able to change – more settings than if you are in an automatic mode, because the automatic mode makes many of those selections for you and you do not have the ability to change them.
On the left hand side you have got two sockets, one for USB and one for an HDMI lead. The USB allows you to connect your camera to a computer and transfer your pictures across and the HDMI lead socket here allows you to connect your camera to a TV in order for you to see your pictures or your videos on a television. You do not get either of these leads in the box so you would have to buy them, but they are useful ways of connecting to other devices and particularly with the USB lead if you want to transfer your pictures onto a computer without having to take your card out and have a card reader. On the other side you have the card socket and this is where your SD card goes. it is a full size SD. On the bottom is the door for the battery compartment to allow you to place the battery. The only other thing on the bottom is the socket which allows you to attach the camera to a tripod. It is a standard fit – if you buy a tripod for a DSLR it will fit this camera so there is no need to worry about that.
Now let us take a look at the front Nikon D3400 buttons. The first thing we see is the infrared receiver and when I mentioned using the infrared shutter button the ML-L3 then that is the receiver for that infrared signal. You do not notice it usually. The second thing to look at here is the redeye reduction lamp and that is very useful when you have the flash operating because sometimes when you photograph people the light bounces directly out of their eyes and creates a red-eye effect. This light will flash an instant before the flash goes off and will cause the pupils to contract and therefore reduce the possibility of redeye. It is also the self timer indicator so if you have got the camera set to self timer then this will flash to indicate that it is on properly, and finally it can also operate as the auto focus assist illuminator which means that if the camera is trying to focus on something in very poor light or focus on something that’s got very little contrast then the light will go off to help it focus better. Then, going around to the other side of the camera then the first thing to look at here is the lens release button and obviously you need to press that button in order to release the lens. Above that and above the badge for the D3400 those three little indents there, they are the internal microphone. It operates reasonably well over a short distance, but just remember if you are videoing not to put your fingers over that.

Then we get onto to quite interesting buttons they are the FUNCTION BUTTON and the FLASH BUTTON. The function button allows you to select specific functions which you can change by pressing that button so you can change image quality and size, ISO, white balance or active d-lighting. Personally I would change that to ISO and the reason I would do that is because it is very useful when you are shooting video. The button above that is the flash mode button and if you press it then it will pop up the flash and allow you to use the flash even if the setting or the mode you are on doesn’t think you need it and that can be useful when you want to use fill-in flash at a time or a point where the Nikon D3400 does not actually think you require it. But that is not all, because if you’ve popped up the flash then if you press this button again then it will give you options for the flash mode. Now there is a video on flash and flash guns so I am not going to go into much detail here but the flash modes on offer here are fill-in flash, red eye reduction, slow sync with red eye, slow sync rear curtain and slow sync and then back to fill-in flash. That is a really useful way of changing the purpose of the flash very quickly. But again that is not all because if you press the flash button and the exposure button which we have mentioned already then you get to change the flash compensation by using the main dial again at the back. You can increase the flash compensation by one stop or you can reduce it down by three stops and that is very useful if you have taken a picture with the flash and you think it is either a little too bright or a little too dark. So by using those two buttons in combination you can actually change the flash compensation very easily and very quickly.
For more about the Nikon D3400, click here
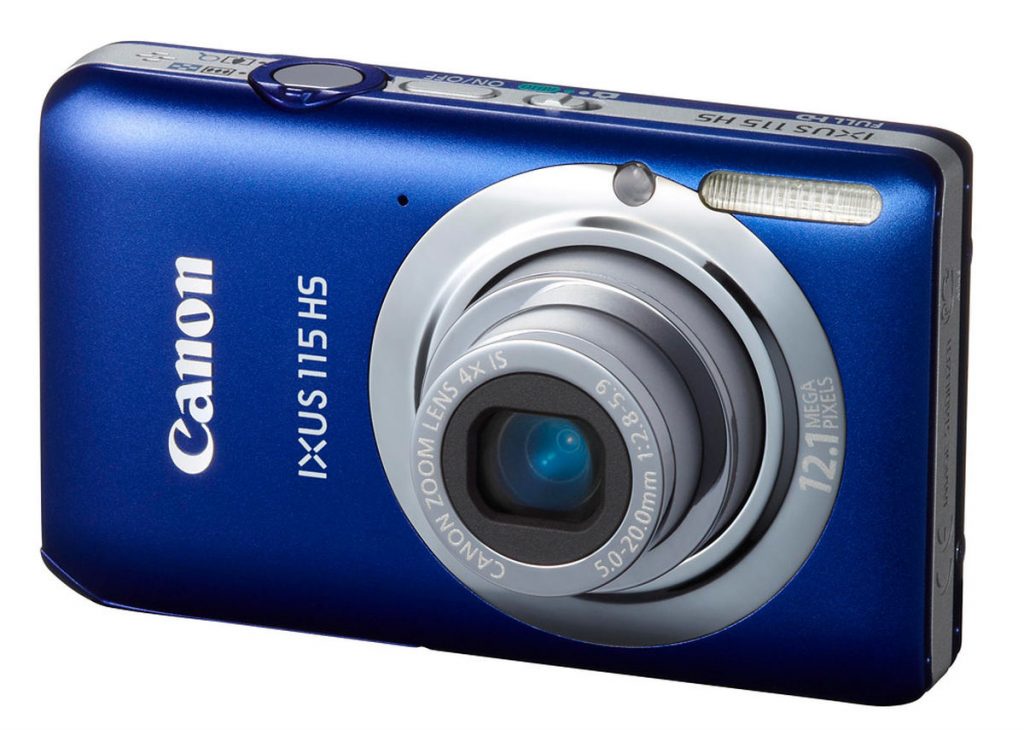 This is one of Canon’s ‘don’t make me think’ range of cameras and, if you want a pretty camera to point and shoot, or record your memorable moments, then this will do the job very well. The 12 Mega-pixel file size gives you good detail and will blow up enough for most requirements. The lens zooms 4x from about 28mm to 112mm, which is perfect for group shots, party pictures or portraits. Canon’s Image Stabilizer system endeavours to counter any camera shake. The Smart Auto function detects 32 different scenes, allowing you to leave all the decisions to the camera and Movie Digest records 4 seconds of video before taking the still, joining all the clips together to produce a mini-film of the days events for you. The Ixus 115 has a fast 8~Frames per second burst rate – though I can’t think what it would be used for. It also has a selection of effects, such as Fish-eye, miniature and toy camera to keep your pictures fresh and creative.